Where do you start when it comes to landscape photography? Isn’t it a pastime plagued by 4am starts, lonely hikes and 20-second windows in the weather? Wrong! Well, partially right, anyway. If you’ve never taken a landscape photo in your life, don’t worry. We can help you get started. Likewise, if you’re a seasoned hand at landscapes, we can also help you too. Below are our best landscape photography tips that should make your venture into scenics that bit easier.
For more help in your photographic journey, check out our Photography for Beginners page, which has links to many of our tutorials to help you get started.
Landscape photography tips for beginners
01 You don’t need a wide-angle lens
You can shoot landscape photos with any lens, whether it’s a wide-angle, a standard or a telephoto.
Although an ultra-wide lens can help you squeeze more into the picture, it can make composition challenging and there’s a risk that everything will look too small in the frame. The trick with an ultra-wide angle lens is to get close to detail in the foreground, although there is a risk that this detail will start to look distorted if you’re too close.
Standard lenses give a distortion-free image, although you’ll need to work harder to make more exciting picture. Why not try shooting a panorama? Although specialist tripod heads can make this easier, software solutions such as Photoshop’s Photomerge feature can produce fantastic panoramas from pictures taken using everyday photo equipment.
They key is to make sure you provide enough of an overlap when you shoot each frame. Position the camera vertically too, as this will give you a much larger panoramic photograph and more freedom to crop the image if necessary.
Telephoto lenses enable you to pick out details in the landscape. The compression effect offered by these types of lenses is also a useful trick for adding drama to scenic photos. Making the foreground, middle ground and background appear closer together than they are in reality is a technique that landscape photographers use to make hills, mountains and forests appear to stretch almost endlessly into the distance.
02 Time of day matters
Landscape photography tips usually include a reference to the ‘golden hours’ – and with good reason. The warm light at dawn and dusk adds a beautiful quality to pictures. The low sun also helps to reveal texture in the landscape.
Don’t pack up when the sun dips below the horizon either. The soft hues at twilight can add an extra dimension to landscapes, while the inky-blue sky of early evening works much better for low-light landscapes than the pitch-black of night.
03 Use Aperture Priority mode
Your camera’s mode dial may offer a Landscape scene mode, but this is a fully automatic option best reserved for snaps. You may not agree with the camera’s choice of aperture or the way in which it increases saturation and sharpening, but you can’t manually override these settings.
This is why Aperture Priority is often a better choice for landscape photography. This semi-automatic mode enables you to change the aperture while the camera adjusts the shutter speed in order to maintain a consistent exposure. You’re also free to tweak the colours, sharpening, ISO and other camera settings.
Altering the aperture in Aperture Priority mode won’t make the picture brighter or darker. To do that, you’ll need to use your camera’s Exposure Compensation control.
04 What is the best aperture for landscapes?
To get everything sharp from the foreground to the horizon requires the use of a fairly small aperture and careful focusing.
Small apertures provide more depth of field – the amount of front-to-back sharpness in a photo. But very small apertures actually lead to softer pictures thanks to the effects of ‘diffraction’.
The aperture at which diffraction starts to outweigh the benefits of increased depth of field varies between lenses, but many landscape photographers favour apertures in the f/8-f/16 range.
To maximise the depth of field and get the sharpest landscapes at these apertures, try manually focusing roughly a third of the way into the scene. Playback the image and magnify areas to ensure the key features are sharp, adjusting the focus point and retaking the photo as necessary.
05 Use a sturdy tripod
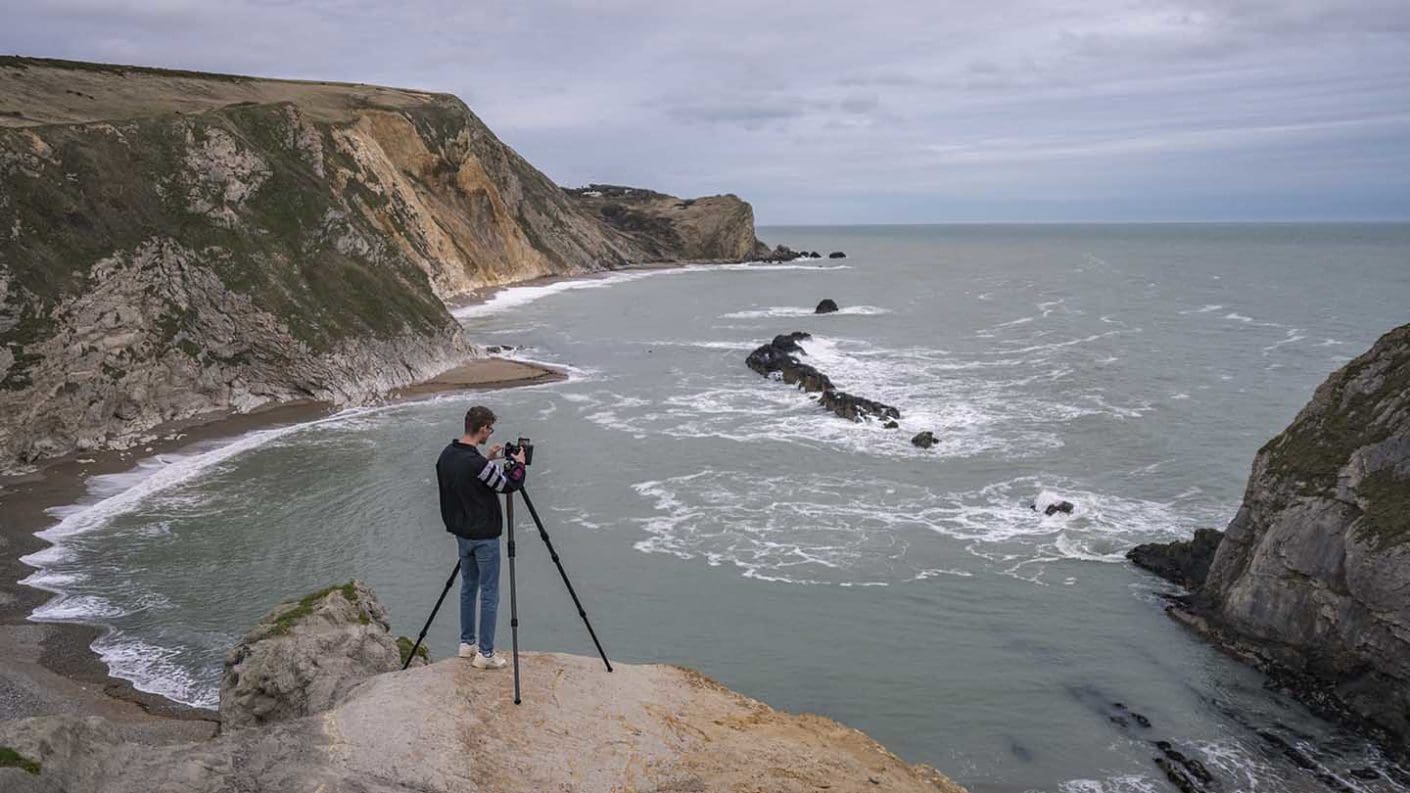
Hackneyed photography advice it may be, but it’s one of the best landscape photography tips for beginners. When it comes to scenics and outdoor photography, a sturdy tripod is a wise investment.
The combination of soft light, small apertures and low ISO settings that are typically used for landscape pictures produce long exposure times. It’s unlikely you’ll get a sharp handheld photo in these conditions, even with an image stabilised lens or camera.
A tripod also has the added benefit of slowing you down and making you consider the composition before setting the camera up.
06 Filters can improve your landscapes
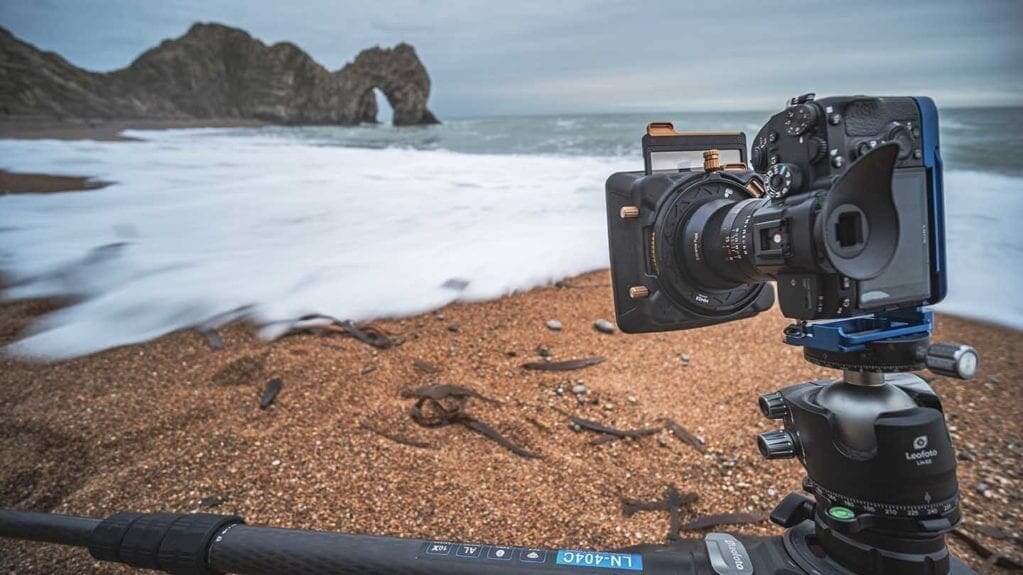
There are three types of camera filters that are made for landscape photography: a polarising filter, graduated Neutral density filters (a.k.a. ND grads) and standard Neutral Density filters.
Polarising filters or simply ‘polarisers’ enable you to remove glare from foliage and the surface of water, and boost the contrast between clouds and a blue sky.
Standard Neutral Density filters are dark filters that reduce the amount of light let in through the lens. They enable you to use slow shutter speeds in bright conditions, producing the classic ‘milky water’ waterfalls and rivers.
Graduated Neutral Density filters feature a dark area and a clear area. By positioning the dark area over the sky, you can bring the exposure of the sky and the landscape closer together, allowing you to record detail in both areas in a single photo. Without an ND grad filter, you may end up with a sky that’s too bright (if you expose for the landscape) or a landscape that’s too dark (if you expose for the sky).
Rather than use traditional ND Grads, many landscape photographers now prefer to take multiple photos of a scene, varying the exposure between each frame. These photos are then combined in software to produce a single well-exposed image.
07 Find a focal point for your composition
Scenic shots that lack a focal point are usually less successful because a viewer’s eye is left to wander around the photo, with nothing to latch onto.
Whether it’s a building, a tree or even the position of a cloud in the sky, try and find an ‘entry point’ into your picture for a viewer.
Again, it may sound obvious, but this is one of the best landscape photography tips for beginners to remember.
08 Use lines to lead viewers through your image
If you want to draw a viewer’s attention to the focal point of the photo, look for lines in the landscape – whether it’s an obvious line formed by a river, a road or a fence, or an implied line created by a series of rolling hills or clouds.
Diagonal lines that lead from roughly the corner of the picture to the focal point tend to create more dramatic pictures, but avoid lines that lead from one edge of the picture to the other – these will simply direct a viewer out of the picture.
09 Fill the foreground
Think about your landscape photos in terms of foreground, middle ground and background. The focal point may sit in the middle ground and the background may be filled by a brooding sky, but don’t neglect the foreground.
It doesn’t have to be dramatic: frost-covered grass or the sky reflected in a puddle can work just as well as the edge of a cliff or an ancient monument.
10 Don’t run the horizon straight through the middle of the photo
You might think that putting the line of the horizon in the centre of a landscape photo will make the picture look more balanced, but that’s a shortcut to boring pictures. More interesting scenics are usually had when the horizon is placed off-centre.
There are no hard-and-fast rules for where to place the horizon, although the Rule of Thirds is a good place to start.
Activate the grid display on your camera’s Live View screen and place the horizon along one of the off-centre horizontal lines. Some camera viewfinders also offer this grid function.
Alternatively, use the autofocus points as a guide, lining up the horizon with the tops of bottoms of the off-centre AF points.
If the land is where the action is, give that the larger portion of the photo. If the sky is more dramatic, do the reverse. The one time when running the horizon dead-centre usually proves to be the best option is when you’re photographing a mirror-like reflection of the landscape in a lake or pond.

Landscape photography tips for aspiring professionals
Few of us can resist the urge to shoot a beautiful landscape on a lovely day, but trying to make a career from it is a whole different ball game.
The truth is that landscape photography is a massively popular genre and with even well-known practitioners struggle to make a living through image sales alone. To make a career out of landscapes, you’ll need more to succeed than just a good camera, an alarm clock and walking boots…
01 Chase the light
If you’re not good in the mornings, maybe landscape photography isn’t the career for you. Your desire to catch a great location in great light needs to border on the obsessive.
Turning up at 9AM, rather than sunrise, simply isn’t good enough in such a competitive business. One of the best landscape photography tips is also the simplest: visit your location at the golden hours of dawn and dusk. The sun is lower in the sky at these times and produces cinematic lighting that will make your images more dramatic.
02 FInd a niche
Do we really need another long-exposure waterfall image, or Ansel Adams-esque study of a US national park? Probably not.
While it’s nigh impossible to find locations that have never been shot before, it helps to specialise in a particular sub-genre mountains or night scenes, for example, or maybe images from a lesser known country.
Landscape photography suffers from very predictable, ‘by the numbers’ compositions, so thinking differently and creatively can pay dividends.
03 Don’t disregard people
Many landscape photographers shun people in their shots, pretending they’ve just stumbled on some pristine undiscovered landscape, or that humanity’s been wiped out by a virus.
Sometimes though, a well-placed person or two can add scale to a landscape, and help you sell images to guide books or tourist boards.
04 Use filters sparingly
Very powerful filters, such as the Lee Big Stopper, have helped define modern landscape photography.
They need to be used sympathetically though or you end up generating the same kind of slow water and moody sky effects as everyone else. As with HDR, less is more!
05 Update your portfolio
If you intend to sell stock images, it’s important to keep updating your portfolio to drive repeat purchases.
You may not make a lot of money per individual sale, but a lot of small sales can soon add up.
Your portfolio must be very obvious, and easy to navigate, on your website now’s not the time to be needlessly arty.
06 Promote yourself ruthlessly
Social media is a wonderful free marketing tool, so make the most of it. As well as Facebook and Twitter, 500px.com and Flickr are a great a way of promoting your new images amongst your followers and attracting potential buyers.
Look at any successful modern landscape photographer and you’ll find a successful marketeer.
07 Publish and teach
Writing/self-publishing a book of your landscapes is a great way to get further exposure and publicity and again, social media makes it easy to promote.
Getting one of your landscapes on a magazine or book cover will also generate great publicity, but make sure you send the editor a professional looking gallery rather than a jumble of unwieldy email attachments.
Running photo courses to a location you know well can be another good income stream, and again, you should work social media for all its worth to promote these trips.
Tips for getting sharper landscapes
Taking sharp landscape photos isn’t difficult, as long as you’re disciplined enough to follow a routine for checking your photography gear and camera settings before you take the shot.
Of course, buying the best quality lenses you can afford helps, but even the sharpest glass will produce a soft picture if it’s not supported firmly during an exposure. Try these tips and techniques for getting razor-sharp landscape images straight from your camera.
01 Don’t skimp on your tripod
None of us have an unlimited budget as far as photography equipment it concerned. But if there’s one camera accessory it’s worth spending more on, it’s a tripod.
It’s rather hackneyed advice to suggest that you need a ‘sturdy’ tripod, but there’s a big difference between a tripod that seems robust enough on the carpet tiles of a camera shop, and one that’s built to shrug off a force 9 gale on the North Sea coast. Read reviews of the best tripods and get the opinions of users who’ve used them in the field to get the true picture of performance.
If sharpness is key, go for a tripod without a centre column, but which gets the camera to your eye level without having to extend every leg section.
Another feature to consider is spiked tripod feet, as these provide additional stability in boggy ground.
Don’t underestimate the difference that a good quality tripod head can make to image sharpness, either. Cheap ball heads can suffer from image creep, where your carefully framed scene slowly drifts in the viewfinder over time. Three-way heads are often better in this regard, but all those knobs and arms can slow things down when you need to make fast adjustments.
02 Use your body as a wind block
If you’re shooting landscapes in exposed locations, then a ‘sturdy tripod’ alone may not be enough.
Acting as wind block by positioning yourself between the prevailing wind and the tripod-mounted camera can help, assuming that the wind isn’t blasting the camera from the front.
Many tripods feature a hook underneath the head or at the end of the centre column. Use this to attach a weight, such as a full (and heavy) camera bag or rocks (commercially available ‘rock bags’ make this simple). A lower centre of gravity provides greater stability, so hang the weight so that it’s almost touching the ground – a length of bungee cord can help here.
03 Use a remote release
The smallest vibrations can make details in a landscape look soft, including those vibrations caused by pressing the shutter release button.
The sharpest landscape photos are the result of hands-off photography, with the camera mounted to a tripod and the camera shutter fired with a remote release.
You can of course use the camera’s self-timer function to trip the shutter, but if timing is critical, such as taking a shot as waves advance or recede on a beach, then a remote release is the better option.
Check out our guide to the best camera remote controls you can buy today.
04 Don’t leave image stabilization turned on
Some image stabilized (IS) lenses can detect when the camera (or the lens itself) is attached to a tripod and switch off the system accordingly. Likewise, many cameras with IBIS, or in-body image stabilization, also have tripod-sensing technology.
But why take that chance? Not all lenses and cameras offer this feature, and if image stabilization remains active while the lens or camera is fixed to a tripod then the system essentially gets into a ‘feedback loop’ and attempts to compensate for vibrations that aren’t present. The result? Soft pictures.
For sharper landscapes, switch off your stabilization.
05 Remove your filters
Some landscape photographers will recoil in horror at this suggestion. But if you want to pull the sharpest performance out of a lens, you need to leave it naked, apart from a lens hood.
Admittedly, the difference in sharpness between a shot taken using the best quality filter and one taken without a filter in place may be small. But this post is concerned with how to get the sharpest landscapes possible.
Arguably, there are a couple of filters that can give the impression of improved sharpness. A circular polariser reduces glare and boosts the contrast between blue skies and clouds, while a strong ND filter will blur any moving objects in a picture, making stationary objects appear sharp by contrast.
06 Don’t rely on autofocus
Autofocus isn’t always accurate: some lenses and AF systems show back-focus or front-focus errors, where the lens actually locks focus slightly behind or in front of the object that appears to be sharp in the viewfinder.
Using AF Microadjustment (AFMA) to calibrate each camera and lens combination you have is one way to improve autofocus accuracy, but when it comes to photographing landscapes, manual focus is the way forward.
Thankfully, the days of having to swap a camera’s focusing screen for one that enables more accurate manual focusing are gone, and the best way to fine-tune image sharpness is with Live View.
As the image you see displayed on the cameras’s rear screen during Live View mode is taken directly from the camera sensor, you can be confident that what you see is what you get. Magnifying areas of the image lets you assess sharpness at a fine level of detail, and pressing the depth of field button button allows you to check for focus shift.
07 Try hyperfocal focusing
Hyperfocal focusing is a technique that involves manually focusing the lens at the hyperfocal distance. It’s a trick that landscape photographers use to give their photos as much depth of field, or front-to back-sharpness as possible.
The old-school advice for photographing landscapes is to focus a third of the way into the scene. This is because the depth of field extends approximately one third in front of the object you’re focusing on, towards the camera, and two thirds behind it.
If you focus on the closest point in the scene, then the depth of field in front of it is essentially going to waste, and the background may fall beyond the depth of field
Hyperfocal focusing enables you to focus at a specific point which makes both the foreground and the background look sharp. The image may look blurred in the viewfinder when you do so, but this is because the image is always displayed at the lens’s largest or maximum aperture. Press the camera’s depth of field button to reveal the true picture.
Hyperfocal focusing does have its limits: it’s unlikely that you’ll be able to squeeze both the distant horizon and something close to the front of the lens into the depth of field, for instance. But it can be an effective way if increasing sharpness at normal shooting distances.
The hyperfocal distance varies according to the combination of camera, lens focal length and aperture being used. Once these are set, you can work out where to focus using a hyperfocal distance chart, or by downloading one of the many hyperfocal distance smartphone apps that are available.
Of course, to set the hyperfocal distance you’ll need a lens with a built-in distance scale. If yours doesn’t, you can measure the distance using a tape measure or laser measuring tool, or estimate it using Live View to ensure that details remain sharp.
08 Avoid apertures of f/22 or smaller
Taking pictures with the camera in Aperture Priority or Manual exposure mode enables you to manually set the aperture. The choice of aperture is an important consideration when it comes to landscape photography, as this gives you more control over the depth of field.
Smaller apertures increase the depth of field and make more of a photo looking sharp – only up to a point, though.
It might sound counter-intuitive, but you should avoid the smallest apertures – represented by high f-numbers such as f/32, f/22 and often even f/16 on a typical wide-angle lens – even though these results in a large depth of field.
This is because the effects of diffraction are more noticeable at smaller apertures.
Diffraction is caused by light striking the edges of the aperture blades as it passes through the lens. This light rays are bent and dispersed, causing the image to appear softer. Diffraction actually happens at all apertures, but the proportion of ‘bent’ light rays is greater at smaller apertures.
09 Consider hiring a professional lens
Professional camera lenses are better corrected for optical defects and are generally sharper than their amateur counterparts. But the price is often prohibitive.
Hiring a high-quality lens rather than buying one enables you get the sharpest glass for a fraction of the cost. It also means you can demo a range of specialist lenses that are found in the camera bags of professional landscape photographers, such as a wide-angle tilt-and-shift lens.
Tilt-shift lenses enable you to use larger apertures than you would typically use for landscapes. These apertures produce sharper images, but they lack the depth of field required to keep both foreground and background details sharp at the same time. However, you can adjust the ’tilt’ of a tilt-shift lens to increase the amount of a scene that is in focus.
10 Shoot at the lowest ISO you can
For landscape images, you want to retain as much detail as possible. Keeping your ISO as low as possible will ensure less noise and grain. Of course, keeping your ISO low means having to shoot at slower shutter speeds, but if your camera is mounted on a tripod and you’re using other tips we’ve suggested above, this shouldn’t be an issue.


