There’s nothing like a decent time lapse, capturing the passing of time in just a few seconds. Over the years the complexity of time lapse videos have greatly increased, with new techniques being used to add motion and visual appeal to the genre.
From a filmmaker’s perspective we’ve all come to expect a great deal more from our kit: more options, greater resolution and of course a few specialist accessories like the Manfrotto Pixi Pano 360.
At the heart of it is the camera itself, and the options and settings you need to capture a straight forward time lapse to get started. In this tutorial we’re going to take a look at the GoPro Hero 6 Black and how to quickly select the time lapse option and adjust the settings.
- GoPro Hero6 Black Review
- How to shoot a Time Lapse Video with a GoPro Hero5 Black
- How to shoot a GoPro Hero5 Session time lapse
- Testing the GoPro Hero5 Black 4K time lapse mode
How to create a time lapse view with the GoPro Hero 6 Black
- Tap anywhere on the screen, and then in the bottom left tap the shooting mode icon.

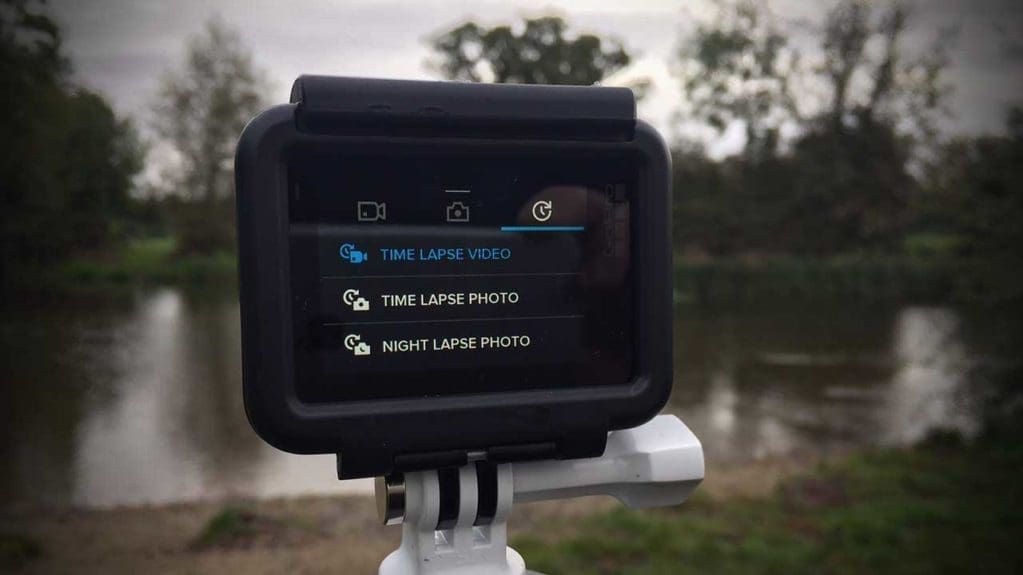
- In the top right of the screen tap the time lapse icon and then Time Lapse Video.

- Adjust the settings by tapping RES for resolution, INTR for interval and FOV for field of view

- Tap the screen will hide the settings.

- Press the record button to start shooting.

- Press the record button to stop recording.

- Download your movie in the usual way to view or stream to your devise.

- GoPro Hero6 Black vs Yi 4K+: which is the best action camera?
- GoPro Hero6 Black vs Garmin Virb Ultra 30: which is the best action camera?
- GoPro Hero 6 Black vs GoPro Hero 5 Black
Below is an example of the time lapse shot on the GoPro Hero 6 Black at 4K resolution.
GoPro Hero 6 Time Lapse options
Once you access the GoPro Hero 6 time lapse options you’ll see three different options: Time Lapse Video, Time Lapse Photo, and Night Lapse Photo, each has its own settings.
- Time Lapse Video which we have selected in this tutorial creates a movie from a series of frames that captured have been captured at specific intervals.
- Time Lapse Photo captures a series of individual stills that can be stitched together as required or printed as a large scale time lapse image.
- Night Lapse Photo captures a series of individual still in the same way as Time Lapse Photo but the cameras settings are optimised for low light.
GoPro Hero 6 Time Lapse Resolution
The options enable you to record time lapses at 4K, 2.7K 4:3, and Full HD (1080p) resolution. There is no option to record audio.
GoPro Hero 6 Time Lapse Interval
Time intervals are the distance in time between each shot. The GoPro Hero 6 Black offers 0.5 (Default), 1, 2, 5, 10, 30 and 60 seconds.
The short intervals such as 0.5 are ideal when capturing street scenes or where there is plenty of movement. The long intervals are better for capturing the setting sun or larger periods of time where you want to, for instance, record a construction project that lasts days but will play back in seconds.
GoPro Hero 6 Time Lapse FOV
FOV (Field of view) refers to the amount of the scene in front of the camera that is captured. Think of it along the same lines as using a wide-angled lens: the wider the lens the more of the scene you will capture.
The standard setting is Wide, which uses GoPro’s fish-eye perspective of the world. This is your only option in 4K resolution. At lower resolutions you can now use the touch zoom feature to adjust the FOV to your exact requirements.


