Leica M10 summary
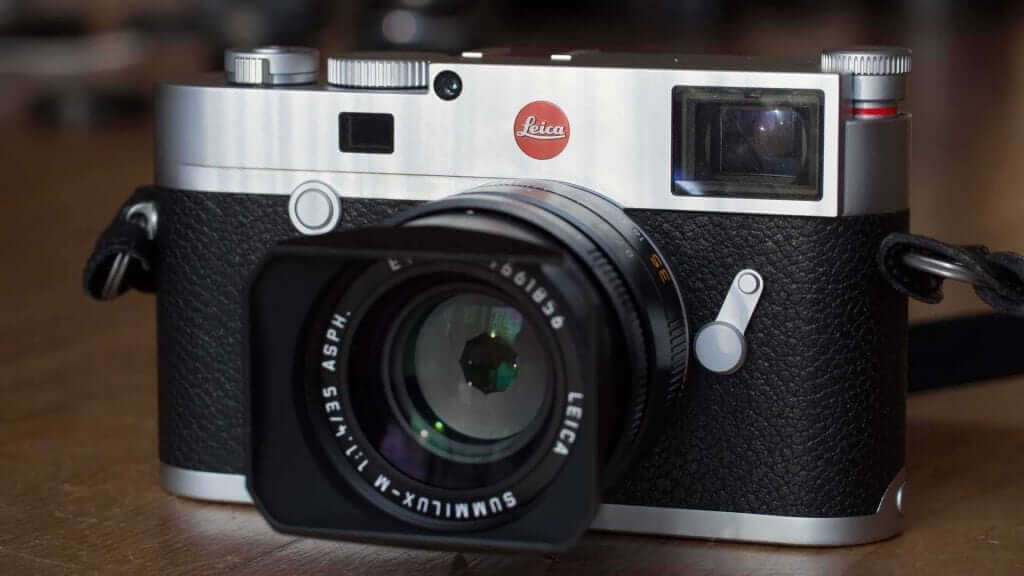
The Leica M10 is the update to the 24Mp Leica M Typ 240, which continues in the Leica range. It’s a 24Mp full-frame rangefinder camera that relies on manual focusing with Leica M lenses. Leica has managed to shave a few millimetres off the M10’s depth in comparison with the Typ 240 and it makes a significant difference to the look and feel of the camera. The user interface has also been streamlined to make using the camera more straightforward.
As before, the traditional build and exposure controls are supplemented by a screen that’s capable of showing a live view image along with a magnified image and focus peaking if you want them to aid focusing.
While the top sensitivity settings are best avoided, the Leica M10 is capable of producing superb quality images with details that look natural even at 100% on screen.
In a nod to recent developments, Leica has given the M10 Wi-Fi connectivity so images can be shared quickly after capture via a smart phone or tablet.
- Camera type: Digital Rangefinder
- Date announced: 18th January 2017
- Price at launch: £5600/$TBC
- Sensor size: Full-frame (24 x 36mm)
- Effective pixel count: 24Mp
- Lens mount: Leica M
Leica M10 Features and Specification
- Processor: Maestro II
- Viewfinder: Optical rangefinder
- Sensitivity(ISO) range: ISO 100-50,000
- Focusing: Manual
- Max shooting rate: 5fps for 30 raw files or 100 jpegs
- Storage: SD/SDHC/SDXC
Leica’s M series of rangefinder cameras are legendary, dating back to 1954 with the M3. The first digital version was the M8 announced in 2006, followed by the M9 in 2011. In 2012 Leica introduced the Leica M Typ 240, the logical successor to the M9 but with a new naming structure.
Now Leica seems to have reverted back to familiar naming territory with the launch of the Leica M10 Type 3656, however, the M Typ 240 is set to continue as a companion model.
Inside the Leica M10 is a new full frame CMOS sensor with 24million effective pixels. This sensor is specifically designed for use with Leica M lenses – that’s important in a camera with such a short flange depth.
Its construction and micro-lens structure is designed to maximise the light gathering potential of the photodiodes and improve performance over that of the Typ 240.
In addition, Leica has omitted the optical low pass filter to enable the M10 to capture more detail. Meanwhile the an infrared filter over the sensor helps avoid unwanted light refraction.
The sensor is coupled with a new second generation Maestro (Maestro II) processing engine. This, combined with a 2GB buffer, enables a maximum shooting rate of 5fps (frames per second) for up to 30 DNG raw files or 100 jpegs. In addition, the sensitivity range has been increased from the ISO 200-6400 of the Typ 240 to ISO 100-50,000.
As usual with Leica M cameras, focusing is manual and relies on a rangefinder arrangement. However, a focus peaking display is available in live view mode and the areas of highest contrast can be highlighted in red, blue, green or white.
Furthermore, a magnified view can be set to appear as soon as you begin to focus to make life easier. This enlarged view can also be moved around the scene using the camera’s navigation pad.
The Gorilla Glass covered screen on the back of the M10 measures 3-inches across the diagonal, has a resolution of 1,036,800 dots and is capable of showing 16 million colours.
Leica has also made the hot-shoe of the M10 compatible with the 2.4Mp Leica Visoflex (around £340/$546) electronic viewfinder (EVF). This handy device can be tilted through 90 degrees for easier image composition at awkward angles. It displays the M10’s live view image along with the magnified view and focus peaking if those options are selected.
For first time in a Leica M camera there’s a Wi-Fi module and the M10 is compatible with Leica’s free M- App to enable remote control and image transfer to a smartphone.
As Apple supports DNG files it’s even possible to transfer raw files and edit them on an iPad or iPhone. However, to keep data costs and transfer times down, it’s possible to set smaller sized images to share and there are 1, 6, 12 or 24Mp options available.
Leica M10 Build and Handling
- Screen: Fixed 3-inch LCD with 1,036,800 dots
- Dimensions: 139 x 38.5 x 80mm
- Weight: 660g with battery
We were loaned a sample of the camera for our Leica M10 review and have been shooting with it extensively for a few days.
While the M10 looks every bit the Leica M camera, there are a few very clear differences from the Typ 240 and M9.
The first of these differences is that the M10 is 4mm thinner than the M Typ 240. Now that might not sound like much of a difference, but proportionally it’s pretty significant. At 33.7mm deep the new camera is the same thickness as Leica’s film M cameras. As well as making the camera more attractive, it’s a little more comfortable to hold.
Leica has achieved this size reduction by eliminating much of the space within the camera body and condensing the electrical layers down to just one by a combination of miniaturisation and spreading out the main board.
The company has also given the M10 a new battery which is slightly flatter than the Typ 240’s. This also reduces battery life but it’s still very respectable at over 600 shots.
Another major change brought by the M10 is that there’s a new dial on the far left end of the top-plate to control sensitivity. This has settings of 100, 200, 400, 800, 1600, 3200, 6400, M and A. The value accessed via M may be set via the menu and the options go all the way up to the ISO 50,000 maximum.
The maximum value selected via the A for automatic setting can also be specified in the menu along with a maxim exposure time (to avoid camera shake).
This sensitivity dial needs to be pulled up from the camera before it can be rotated. It’s a little awkward to lift ready for action but at least it’s not likely to happen accidentally.
If you want to take manual control over sensitivity and expect to need to change the value fairly frequently, the dial can be left up and it rotates easily with a slight click between each stop.

Another significant change since the Typ 240 sees the number of buttons on the back of the camera reduced to just three (marked LV, Play and Menu) along with the four-way navigation control. This, the traditional exposure controls and the relatively concise menu makes the Leica M10 extremely easy to get to grips with.
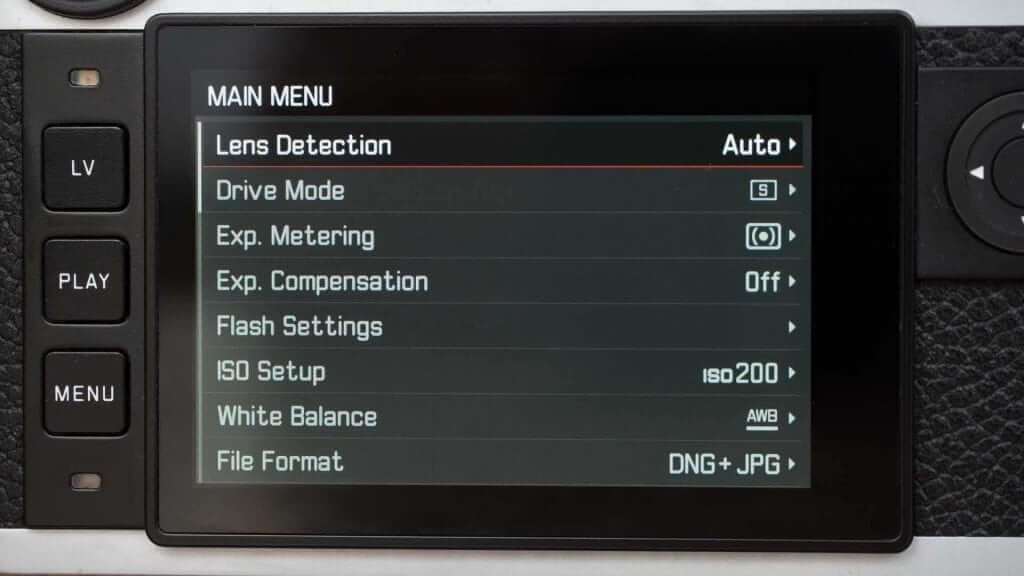
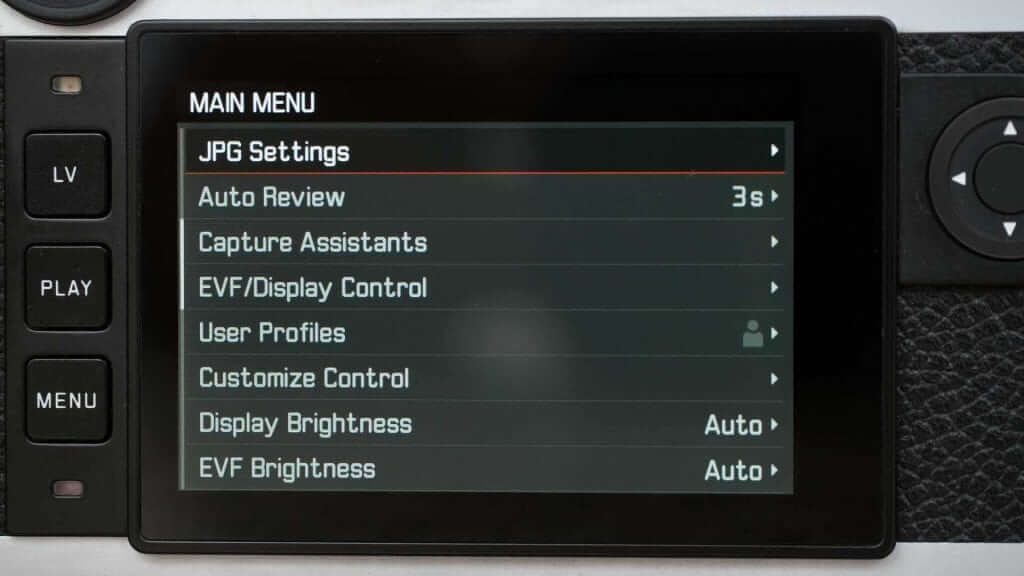
On the subject of the menu, pressing the Menu button reveals a customisable screen of favourite features. It’s possible to assign up to 40 features to the Favourites menu, but that’s 2/3 of the entire menu so it’s a bit excessive.
Pressing the menu button a second time reveals the main menu, which is spread over four screens. Each press of the menu button advances you through a screen or you can use the navigation control. Easy.
On the top of the M10, to the left of the power switch and shutter release (with threaded remote socket) with the shutter speed dial. This has whole stop markings in the range 8-1/4000 sec plus Bulb and A for automatic settings. While the markings are in whole stops the dial can be turned in half stops.

The top and bottom plate of the M10 are machined from brass while the front, back and sides are made from die-cast magnesium alloy. This gives the camera the familiar robust, ‘built to last a lifetime’ feel of a Leica M camera.
The narrower build also makes the camera easier to grasp, but the supplied shoulder/neck strap is a wise precaution. Leica also offers a metal thumb support (around £160) that can be slipped into the hot-shoe to give a more better grip and increases the security of the hold considerably.
There’s also a loop-like finger-grip that gives even more security, but I find a little restrictive to use.

Leica M10 Viewfinder
The Leica M10’s viewfinder has a 30% larger field of view and 50% longer eye-relief than the M Typ 240’s, the latter is to make it more convenient to use when wearing spectacles. In addition, the magnification is up from 0.68x up to .73x.
It’s also calibrated to -0.5 diopter, but corrective lenses are available from -3 to +3 diopter. An adapter is available to allow earlier diopter lenses to be used on the new camera.
Bright lines indicate the framing for 35mm and 135mm, 28 and 90mm or 50mm and 75mm. The appropriate lines show automatically when a lens is mounted, but you can also see the framing by flicking the switch on the front of the camera.
With the Leica Summilux-M 35mm f/1.4 ASPH. lens mounted and looking straight ahead through the viewfinder, I can just see the outer limits of the frame. If I put spectacles on I have to move my head around a little to see the bright lines.
When the 28mm bright lines are activated I have to move my head to see them even when I’m not wearing glasses. However, I’m a left eye user.
Switch to my right eye and the shape of the camera means the viewfinder sits at a better angle to my eye and I’m able to see the 28mm bright lines when I’m not wearing spectacles.
One consequence of the M10’s rangefinder design is that the lens extends into the viewfinder frame, so you need to be alert to anything unwanted that could be in the bottom right corner of the image.
Leica M10 Focusing
As I mentioned earlier, the Leica M10 uses rangefinder focusing. This means that at the centre of the viewfinder there’s a rectangle with two ghost images. When the focusing ring of the lens is rotated the distance between these two images changes. Once the images are in perfect register (ie overly each other), the subject is in focus.
As the viewfinder magnification is 0.73x and the mechanical measurement of the rangefinder (the distance between the rangefinder window and the viewfinder) is 69.31mm, the effective basis is 50.6mm. This is long enough to make focusing relatively easy.
When you’re shooting spontaneously, it’s often a good idea to be guided by the lens distance scale and set an aperture such as f/8 or f/11 (or smaller) to give sufficient depth of field to conceal focusing errors. Over time using the two methods of focusing helps you to build up a greater appreciation of subject distance and gradually you get faster at focusing the lens.
Leica M10 Screen and Live View
As mentioned earlier, the M10 has a 3-inch 1,036,800 dot screen. This is fixed and is not touch-sensitive. It provides a nice clear view even in quite bright light and doesn’t suffer excessively from reflections. However, it would be much more useful if it were on a tilting hinge to allow it to be seen more easily from above or below head height. If I’m honest though, I think it’s very unlikely that Leica would do this.
Focusing in live view mode is relatively easy using the magnified view and focus peaking as a guide.

Leica M10 Performance
With 24 million effective pixels on its full frame sensor, the Leica M10 produces 5976 x 3984 pixel images. That’s a nice pixel count that enables you to produce prints measuring just over 50cm or 19.8-inches wide at 300ppi while keeping noise within relatively safe limits.
At low to mid sensitivity settings the M10 produces attractive images and jpegs that look natural, even at 100% on screen. The detail is sharp without being oversharpened and there’s no smudging of out of focus areas – they just look out of focus.

Noise is controlled well up to around ISO 25,000. At this setting images have a fine grained texture that’s evenly distributed and not unpleasant. I wouldn’t hesitate to use it if the lighting demanded it and I’d consider using it to inject a little texture in other circumstances.
Step up above ISO 25,000 and chroma noise (coloured speckling) becomes more evident in areas of uniform tone. There’s even a suggestion of a grid pattern in some areas of images shot at ISO 50,000.
I checked this carefully in my shots taken during a very rainy night in London and while there are vertical streaks that can be attributed to raindrops, the only explanation for the horizontal pattern is the sensor or processing.
In its default settings the M10 usually produces natural colours in natural light and images are a good match for the scene. Activating the Monochrome option for jpegs tends to result in quite flat images unless the contrast is boosted, but most Leica M Photographers are likely to use this a guide and will convert raw files to black and white post capture.

The Multi-field metering doesn’t appear to be the most sophisticated in the world and is quite easily distracted by bright areas in the scene.
After shooting for a little while you find yourself using the Multi-field metering like a centre-weighted system, taking a reading from an area and recomposing. At that point most people are likely to switch to the centre-wighted or spot metering option.
Leica M10 Sample Images
Leica M10


Leica M10 Verdict
Leica had a tricky job on its hands when attempting to update the Typ 240. It’s aim was to bring a camera that’s valued for its traditional build and focus on the essentials of photography a little more up to date. I think it’s done a very good job. The handling has been streamlined and the addition of a sensitivity dial means that you can check and adjust all the exposure settings without powering up the camera.
As the Leica SL and Leica T offer modern features such as touchscreen control and an electronic viewfinder, it’s possible that Leica’s engineers feel liberated to really centre on traditional photographic controls with the M10. To that end, the M10 doesn’t have video recording capability, but the Typ 240 which does, is set to continue in the range.
The Leica M10 isn’t intended to be an everyman camera, it’s not designed for fast shooting and thinking later. It’s for photographers who really want to focus on the most important aspects of photography, exposure and composition.
With thought and planning it is possible to get images of action and events with the M10, and it’s discrete looks and high quality results will make it appealing to well-heeled street and documentary photographers.
With practise the rangefinder focus becomes second nature, but if you prefer something a little more of this century, the optional EVF makes a good addition.
If I could add one thing to the Leica M10’s feature set it would be a tilting screen. That would make using live view and low or high level shooting just a little bit easier, but I think it’s unlikely to happen.
All things considered, the Leica M10 is an excellent upgrade to the Leica Typ 240. In the right hands it’s capable of producing very attractive images with lots of natural detail. It’s also built to last.

