Leica M10-P Snap Verdict
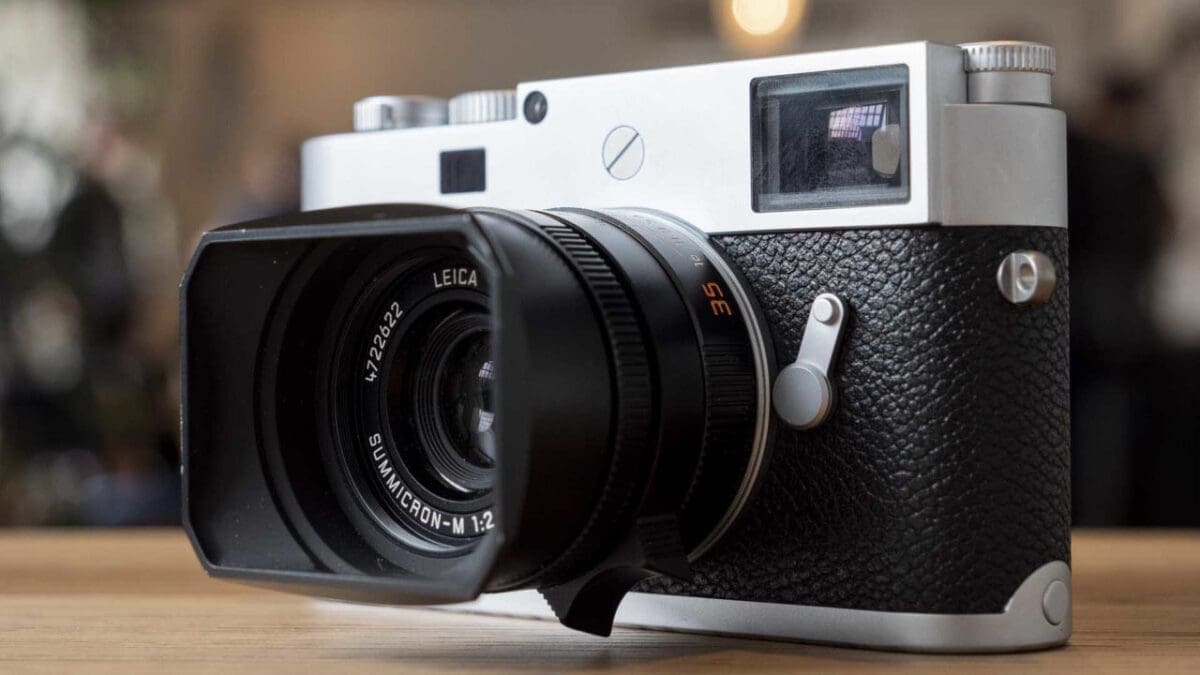
The Leica M10-P (Typ 3656) is an update to the 24Mp Leica M10, which is set to continue in the Leica range. The new camera is based upon the M10 but is designed to be even more discrete with a near silent shutter and no red badge on the front. It also adds a touch-screen, which may come as a shock to traditionalists.
Like the M10 and the rest of the Leica M-series, the M10-P is a digital rangefinder camera with manual focusing. It has the same 24Mp full-frame sensor as the M10. It has a metal construction and Leica’s build quality remains second to none. It’s also capable of producing very high-quality images.
For Leica M10-P
- Sublime build quality
- Streamlined interface
- Touch-control
Against Leica M10-P
- High price (£6,500 body only)
- Manual rangefinder focusing doesn’t suit everyone
- Fixed screen
- Leica M10-P: price, specs, release date confirmed
Key Features
- 24Mp Full-frame (24 x 36mm) CMOS sensor
- Maestro II processing engine
- Rangefinder focusing (manual)
- Sensitivity(ISO) range: ISO 100-50,000
- 5fps maximum continuous rate
- 3-inch, 1.04Mp touch-sensitive TFT LCD
- Storage: SD/SDHC/SDXC
Leica introduced the M10 in January 2017 to give photographers a digital camera that resembles one of its film rangefinder models more closely than previous models.
As is traditional with Leica’s naming, the M10-P is a more streamlined and discrete version of the M10. It uses the same 24Mp full-frame CMOS sensor that is designed to specifically work with the short flange depth of the M system. As before, there’s no optical low pass filter to help boost detail levels in captured images.
The Maestro II processing engine is also used in the M10-P. In addition, there’s the same 2GB buffer and a maximum shooting rate of 5fps (frames per second). Sensitivity can also be set in the range ISO 100-50,000.
Modern Assistants
Leica M cameras are manual-focus rangefinders. However, the M10-P has focus peaking to help with this in Live View mode. Also, the camera can enlarge the Live View image to make the details clearer. The enlargement point can be selected with a tap of your finger on the screen.
Leica has also included an electronic level view to make it easy to get subjects straight.
As with the M10, the M10-P’s hot-shoe is compatible with the 2.4Mp Leica Visoflex electronic viewfinder (EVF). This can be tilted through 90 degrees for easier viewing from above. It shows the Live View image complete with the magnified view and focus peaking if selected.
The M10 was the first Leica M camera to have Wi-Fi connectivity built-in and this continues into the M10-P. Leica’s free App allows you to control the camera remotely and to transfer images to a smartphone.

Build and Handling
- Screen: Fixed 3-inch LCD with 1,036,800 dots
- Dimensions: 139 x 38.5 x 80mm
- Weight: 675g with battery
The M10 is 4mm thinner than the M Typ 240. That doesn’t sound a lot but it makes quite a difference and it means it’s the same thickness as Leica’s film M cameras. It makes it easier and more comfortable to hold than Leica’s earlier digital M-series cameras.
Leica has used the same chassis for the M10-P. That means its made from die-cast magnesium alloy with a brass top and bottom cover. The finish is either black or silver chrome plate.
It has really solid feel that speaks of the damage it could do to your foot if you dropped it.

Leica has put a lot of work in on shutter of the M10-P to make it very quiet. It’s not silent, but it’s very close to being so. In fact, it’s the quietest M-series camera to date. It’s easy to imagine shooting at a wedding, at a social engagement or in the street and it not being noticed at all.

A comparison of the sound waves from a collection of cameras.
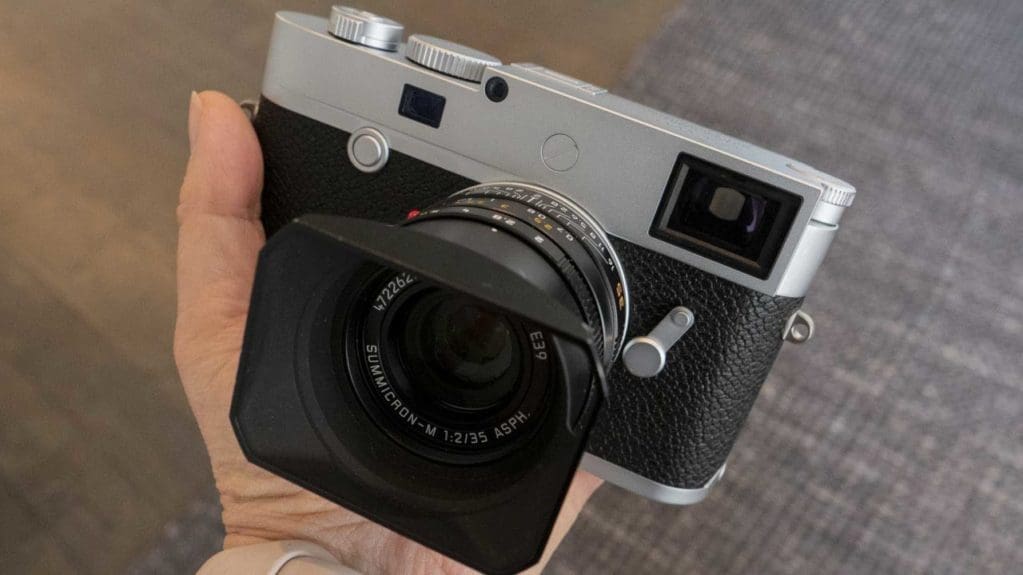
In another move to make the camera look more discrete than the M10, there’s no red badge on the front of the M10-P. The top-plate, however, has an ornate version of the Leica name. Leica has also given the hot-shoe a metal cover that matches the top of the camera. It’s a nice detail.

Controls
Like the M10, the M10-P has a sensitivity dial at the left end of the top-plate. There are markings for ISO 100, 200, 400, 800, 1600, 3200, 6400, M and A but half-stop settings can be set. The A stands for automatic and you can set the maximum value as well as the longest shutter speed via the menu.
The M setting allows you to access you’re preferred ISO setting quickly. It can be set all the way up to ISO 50,000 in the menu.
To avoid the sensitivity dial from moving accidentally, it has to be pulled up before it can be rotated. If you need to make frequent changes, the dial can be left in the up position. That’s helpful because it’s quite fiddly to lift, especially if you have long nails.
Exposure time is changed via the shutter speed dial on the top-plate while the aperture is adjusted by a ring on the lens. The shutter speed dial is marked in whole stops from 8-1/4000 sec. There are also markings for Bulb and Automatic.

Touch-control
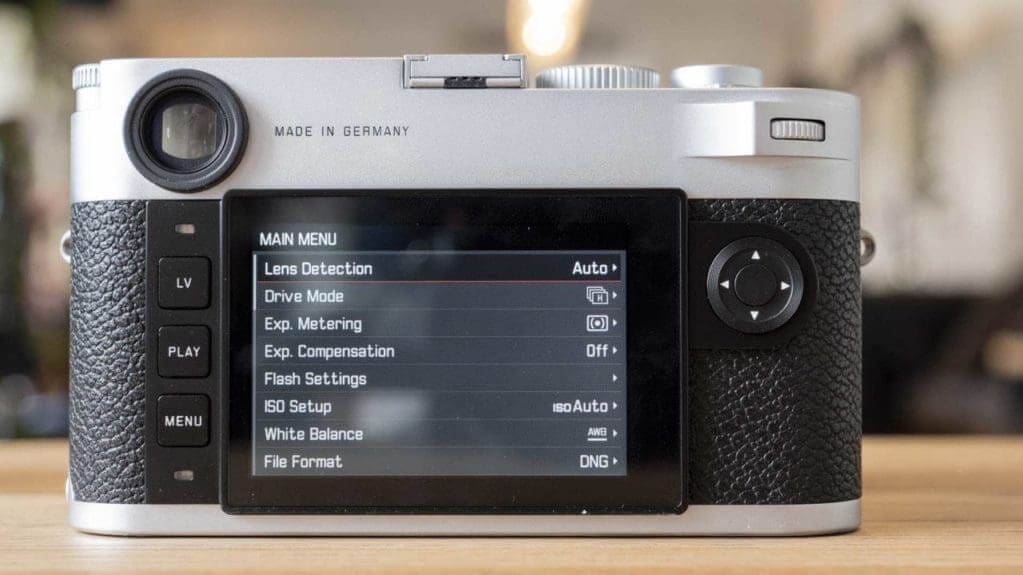
To the left of the M10-P’s screen, there are just three buttons. On the right, there’s the four-way navigation control and a centre button. Pressing the centre button reveals a display on the scren that shows key settings such as battery level, the exposure values, white balance, file format and so on.
Those settings that don’t have a dedicated dial can be selected with a tap on the screen and then adjusted. The adjustments can be made either by tapping the screen or using the dial by the thumb rest or the navigation pad.
As I mentioned earlier, in Live View mode you can also tap the screen to select the area that you want to be magnified during focusing.

The menu is fairly concise and it’s easy to find the options you want. Helpfully, each time you press the menu button, you advance another screen in the menu. It means that you can quickly become familiar with operating the M10-P.
Viewfinder
Leica has put the M10’s viewfinder in the M10-P, which means it has a magnification of .73x. The standard dioptre setting is -0.5 diopter, but -3 to +3 diopter lenses are available.
A lever on the front of the camera allows you to see the available bright lines in the viewfinder. This is helpful when you’re trying to decide the framing for a shot. The lines show the frames for 35mm and 135mm, 28 and 90mm or 50mm and 75mm lenses.
The correct lines are shown automatically when a lens is mounted. However, the 28mm lines are quite hard to see and you have to look around the viewfinder to spot them.
I find wearing glasses an issue when looking in the viewfinder. It’s hard to see the correct framing and its best to take them off.

Focusing
A rectangle at the centre of the viewfinder shows two ghost images. These merge or diverge as the lens focus ring is rotated. When the two images overlay each other perfectly, the subject is in focus. This rangefinder focusing is an art that takes practice, but experienced users can perform quickly.
If you want to be more spontaneous, you can use the focus scale on the lens and a small aperture to capture enough depth of field to give you a comfortable margin of error.
Alternatively, you can use the Live View image on the screen to guide focusing. The downfall here is that although the screen provides a nice clear view, it’s fixed and can’t be tilted. This makes getting accurate focus via the screen difficult unless the camera is at eye-level. That’s even with the focus peaking activated.
This makes the optional electronic viewfinder an attractive purchase as it can really speed/ease focusing. I haven’t been able to use this on the M10-P, but I have used it on the M10. I think it transforms the camera. Yes, it spoils the sleek lines, but focusing is quicker and easier in a range of situations.

Performance
The results from the M10-P are on a par with those I’ve shot with the M10. You get attractive images with lots of detail and a nice level of contrast.
At sensitivity settings like ISO 3200 and 6400 that were once considered high, noise is extremely well controlled. There’s just a fine, uniform texture and plenty of detail visible at 100% on-screen. The images also look natural and sharpening is handled well.
The fact that Leica makes ISO 6400 the maximum marked setting on the sensitivity dial is probably a hint about which values to use. I find that the upper sensitivity settings are best avoided as there’s a hint of a grid pattern. Colours also get a bit drab.
I’d limit myself to ISO 25,000 or even 12,500. At those settings, there’s a fine, even texture visible at 100% and images look good in colour or when converted to black and white.
In the standard jpeg and automatic white balance settings, the M10-P captures natural looking colours that match the scene well. The auto white balance system copes quite well with artificial light, producing images that don’t have a strong colour cast, but equally don’t look too neutral either.
Exposure
As I have found before, Leica’s general purpose metering is prone to underexposing when there’s a bright sky. So if you’re shooting using the viewfinder you need to be aware. If the light level is consistent, it’s well worth shooting in manual exposure mode.
If you plan to shoot in program or aperture or shutter priority mode, it’s a good idea to customise the dial on the back of the camera to access exposure compensation directly.
Although underexposure can be an issue, the M10-P has a wide dynamic range. This means that raw images captured at the lower sensitivity settings can be brightened siginifciantly if needed. In fact, in some instances, you can brighten them by 4EV or more and still get good colour, gradation and detail.
Leica M10-P Sample Images
Follow the link to browse and download full-resolution images

The shutter is quiet enough to not draw attention to the camera


Taken at ISO 40,000

Dark subjects like this can be very hard to get in focus with a rangefinder.

The detail in the stitching on the leather is excellent, everything looks very natural. Just as it did in reality.

There’s just a fine texture of evenly distributed noise visible in this image shot at ISO 3200. The detail in the wood is captured well.

Tricky conditions for the auto white balance system but its handled them well.
Verdict
The Leica M10 seemed like a significant upgrade from the Typ 240. The M10-P isn’t intended as an upgrade to the M10 but as an alternative. It’s aimed at discerning Leica photographers who want a very streamlined and discrete camera. They will be very happy and will love the high-quality images the M10-P produces at low to mid-range sensitivity settings.
Those photographers may be surprised by the touch-screen, but Leica has been moving in that direction for a while. And of course, you don’t have to use it. I think it’s a step in the right direction, but it would be even better if the screen was a tilting one.
Leica doesn’t cut corners. It doesn’t make cameras to a price. If the company had felt the time was right to put a tilting screen on an M-series camera it wouldn’t have excluded it on grounds of cost. I’m pretty confident that it’s not there because it’s thought to be a step too far for Leica M fans. I think that’s a shame because the combination of touch-control and Live View makes the M-series more accessible to new photographers. By which I mean people who never have considered Leica before.
I don’t object to manual focusing, but rangefinder focusing has its drawbacks. It’s especially tricky with dark subjects or when there’s not a reasonable amount of contrast. You’re forever trying to find a distinct edge to work with. It’s far easier to use the Live View image, especially with the magnified view.
Optional Extra
I’d highly recommend buying the Leica Visoflex electronic viewfinder with the M10-P. It spoils the camera’s outline a bit, but it in my view, it makes the camera more enjoyable to use. Plus you get more sharp images.
To be honest, I’d probably like the M10-P a lot more if it had an electronic viewfinder. Rangefinder focusing just seems out of step. That’s not going to win me any fan mail from the Leica massive, but there you have it.
